Nail Art-Satisfying and Trendy Nail Designs
Today I will discuss nail art and all those you want to know about it. You will get an elaborate discussion and salient features of this art form.
Pampering nails started way back in the 15th century by Incas of the Inca Empire In those times images of eagles were in vogue. Nails were considered as a blank canvas and decoration was done in the form of different beautifying assistants.
History of Nail Art
During 600 BC the aristocrats used to decorate their nails with the silver and gold powder of the Zhou administration
As per records nail art became famous in the 1920s. In those days ladies used red oils and tinted emulsions to paint them.
In the early days, nail shades were made with gelatine, vegetable dyes, bee wax, etc. until china originated nail polish.
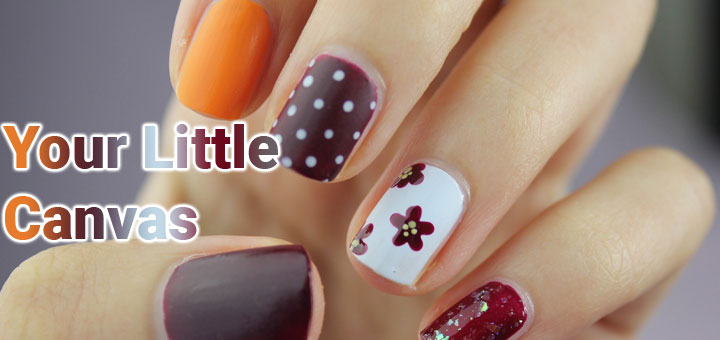
Your little canvas

Till today nail art is a fashion status and tinted nails replicate the fashion in you. With the precise quantity of information, you can transform your nails into a classic!
Before beginning the nail-glorifying exercise we have to check the fitness of the nails. If the condition is not proper then decorating them will be of no use.
Manicure
A monthly manicure is advisable to obtain pretty and tidy hands.
Steps to do a manicure at home
- Remove your existing polish.
- Soak your hands in lukewarm water with little soap and oil. This will soften your nails and moisturize your hands.
- Wipe your hands. Use a soft wiper.
- Give a decent appearance to those nails. Use a filter.
- Splash a few droplets of oil on the spikes and shift back the skin with the help of a cuticle stick.
- Circulate the buff on the nail bed. This step will oxygenate them and give them a shine.
- Caress your hands with a good quality hand lotion.
- The nail canvas is now ready to be painted.
Some nail care mistakes/habits
Some habits that damage the wellness of the cuticles are as under
- Nail-biting.
- Not letting nails breathe. Leave the nails minus nail paints for some days.
- Excessive use of Acetone (nail polish remover) -Exposure to acetone can dehydrate the nail plate, cuticles, and the surrounding skin. The nails become dry, flaky, and brittle.
- Using external force – Do not use your nails to open any lid.
- Not moisturizing your nails before going to bed.
How to strengthen the nails?
Strengthening method
Formula 1
Things required
- 1/2 bowl of lukewarm water.
- 1/2 lemon juice (keep the peel for later use)
- 1 tsp salt
- 1/4 tsp baking powder
- 1/2 tsp white vinegar
- Mix the above ingredients and soak your hands in the solution for 15 minutes.
- Now take out your hands and rub the nails with the lemon peel. Gently rub the nails with it for a few minutes.
Formula 2
Things required
- 2 tbsp coconut oil
- 1/2 lemon juice
- Mix the two ingredients and dip your nails in the oil for 15 minutes. Give a gentle massage to your palms and nails by rubbing them for a few minutes. Do not wash your hand. Go off to sleep. (Implement this method at bedtime).
Nail Serum – a problem-solving cure for nails
Oils stimulate growth and help to improve the health and appearance of your nail.
Recipe
- 1 tsp castor oil
- 1 Vitamin E capsule
Omega fatty acids and protein present in castor oil help in the speedy growth of the nails. Vitamin E moisturizes and prevents cracking cuticles. It also prevents yellow nail syndrome and softens the dry skin around the nail bed.
Mix both ingredients and store them in a container. Before going to bed apply these oil combinations to your nails.
Conceive impeccable spikes at home?
Here are some tips and tricks for nail art at home. All you need is your favorite nail polish, Nail polish remover, dabbing dish, cotton swabs or sponge, a thin paintbrush, toothbrush, bobby pins, and toothpicks.
Some Ideas
1- Paint your nails with a light color nail polish like white, pink, etc. Take a darker shade polish and dip the brush into the shade. Play with the color as if you are painting on a canvas.
2- Coat the nails with a white-tone glaze. Splash out a little nail polish on a clean plate. Dip the edges of the toothbrush in the nail polish. Shower colors with your thumb from the tip of the toothbrush to the base. You will be pleased to see the result.
3- Apply a very light shade on alternate nails. Take a contrasting tone of nail enamel. On these fingers make small flowers with a darker shade. Use the darker shade to cover the remaining nails without any floral pattern.
4- On the primary tone on the nails make traditional polka dots with the help of a bobby pin. Dip the bobby pins in contrasting shades and tap them.
5- This time instead of using bobby pins go for toothpicks. Yes, try this fun design. Hold the pick in the center of the polish. Move it invariant directions.
6- Create impressions on the light coat with the help of sponge pieces. Dab the sponge slices on any contrasting shade and pat.
Nail extensions
Nail extensions are artificial tips attached to your original nails. This method is for those who do not have long and beautiful nails.
Multiple nail extensions
These nail extensions are classified depending on the element of the Prolongations.
1- Acrylic Nail Extensions – Paste of polymer particles and monomer fluid are the main ingredients of these extensions. These are the most used extensions. They last for nearly four weeks.
2- Gel Nail Extensions or gel overlays – LED or UV light is used to set a thick gel effectively on the nails.
3- Fiberglass Nail Extensions or silk nail wraps – An exact nail-sized synthetic material is fixed on the surface. Following an activator is sprinkled on it.
All the suggested extensions are temporary. There are no permanent nail extensions available.
Five basic nail styles?
Some general nail appearances are round, squoval, pointed, almond, or square.
How to select the right nail shape?
1- Almond – This will give you classy and captivating recognition. Wear metallic polish tones.
2-Square – Stylish look. Bold tones go well.
3-Squoval – This shape is suitable for all. A geometrical pattern completes the look.
4- Pointed – Attractive peg designs are possibly a big yes. Looks good on long fingers.
5- Round – All tones suit this shape. It gives a pleasing look. Suitable for all sorts of fingers.
Conclusion
Those were some good-to-know information about nail art. I have given some DIY and pointers related to the maintenance of the nails.
I am proceeding toward answering some questions.
What tools are needed for nail art?
Tools for doing nail art at home
Cotton swabs or sponges, a thin paintbrush, a toothbrush, bobby pins, and toothpicks will do the job.
Professional tools for nail art are Artificial nails, dotting instruments, thin top brushes, nail paint removers, art tape, rectifying brushes, stencils, manicure kits, etc.
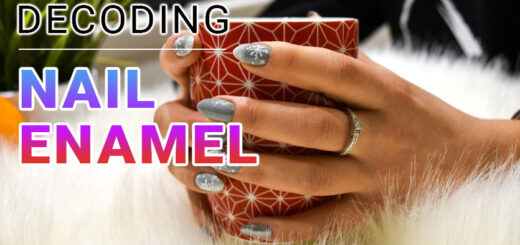
What is indie nail polish?
Indie nail polish is an individually hand-blended shade brand. A precise style is managed and maintained.
Is there any rule to be obeyed while implementing Indie Nails?
Do not observe any rule book. Do what you want. Indie nail paints are experimental.
You can play with the colors. You can make fun patterns. Even mixing and match of colors is allowed
.Every finger can have a different identity. You can make a smiley on the middle finger, and a flower on the pointer.
How can I do nail art at home?
I have given tips and tricks for nail art at home. Please follow the header to conceive impeccable spikes at home.
Six ideas are delivered. I hope those easy ideas with minimal things will embellish your nails.
How do you make the best nail art?
Simple things are enough to do nail art. All you need is nail polish, Nail polish remover, cotton swabs or sponge, a thin paintbrush, toothbrush, bobby pins, toothpicks – name a few.
Use your imagination and go on. The sky is the limit.
What is the most popular nail style?
There are five common nail styles.
The most popular styles are – round, squoval, pointed, almond, or square.
How do you do toothpick nail art?
Doing toothpick nail art is very simple.
After applying a very light color nail polish design is created with a toothpick. It’s very simple.
Dip the toothpick in a dark shade of nail enamel. Hold a toothpick in the center of the applied nail polish. Move it in distinct directions.
Create a pattern of your choice.
Summarize
This was a small post on nail art. I will appreciate hearing from you’ll. Please write down your comments and any issues arising in your mind.


Wonderful article. Will definitely suggest it to my wife. Products are nice too. Will love to see more articles like this. Kudos!